Showing posts with label Martha Stewart. Show all posts

Sunday, 26 August 2012

Distressing Bank Holiday!

Hello One and All! Thanks for visiting!

Please don't get upset by the title - even though it has been raining most of the weekend so far, we have had a lovely weekend at The Paperlane! Today was a workshop on how to use Distress Inks to colour character stamps. The project that we made was a small gift bag - all of the ingredients for the project are listed below.
 
Here is a picture of the fabulous projects that were made in the workshop today...
 
PROJECT INGREDIENTS (all stocked at The Paperlane):
 
In the Bag Die (Tim Holtz)
Pocket Gift Tag (Memory Box)
Character Stamps (Magnolia)
Fontiments: Birthday Sentiment Stamps (Uniko Studio)
Border and Ribbon Punches (Martha Stewart)
Distress Inks (Ranger Inc)
Vintage Seam Binding (Paperlane by the metre)
 
All of the images were coloured with Distress Inks, and we had great fun playing with the technique - they all concentrated so much it was silent at times! I thought they had all gone home ;-) 
 
Thanks for a lovely day ladies! Time flies so fast when we are having fun! Look forward to seeing you all again soon! X
 
UPDATE: For everyone who is waiting for the Saturated Canary stamps to arrive from America - they are on their way! We will let you know straight away via the blog, Facebook and Twitter when they are here! You could always drop in the store or email if there are any that you would like saving!
 
Ta Ta for Now! :-)

Saturday, 25 February 2012

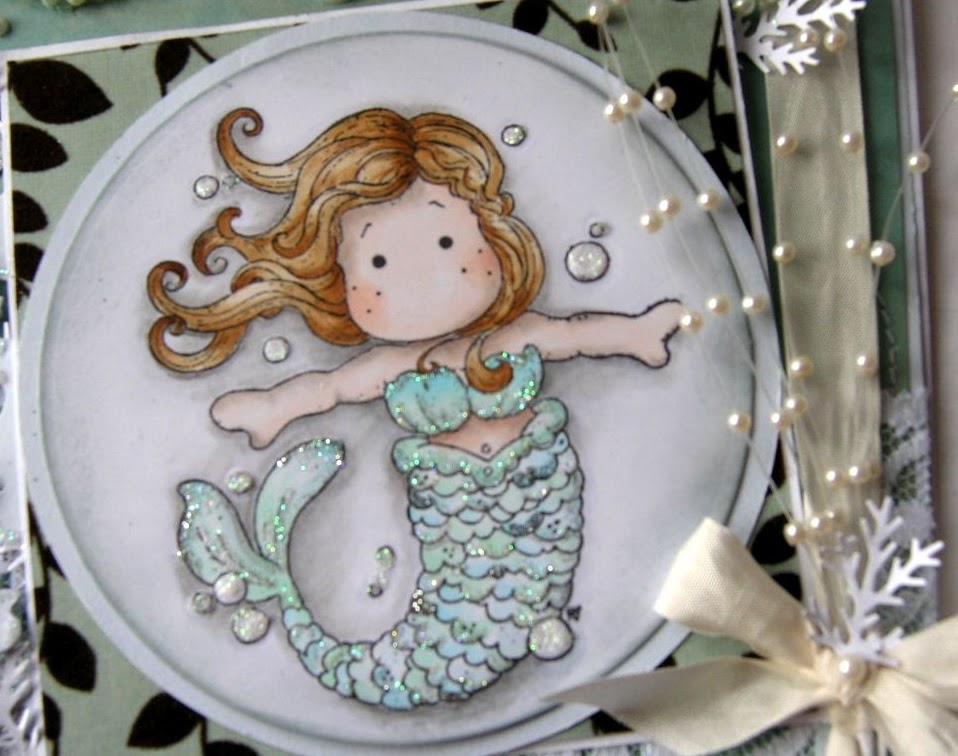
Magnolia's Little Mermaid Card


Morning, Well its sunny outside think springs on its way, Little lambs are in the fields, and the birds are tweeting and the temperature's  making its way up the thermometer.
This month I have made a card to share with you and give you some inspiration and to get  you crafting your own creative delights.
So today's card features magnolia's little mermaid stamp.
Cute little stamp isn't she, I used copic markers to colour her, I used a range of blues, greens and blue/greens all the lightest shades of the colour groups with a touch of cool grey here and there, for here fishy scales and shading, you should know  me by now we have to have glitter  so just picked out a few scales and her tail to add glitter. Used 2 colours of glitter one is silver and the other white iridescent with blues and greens tones in it, which compliments the colours used to colour her.
The skin tones were coloured with the usual combination of copic markers  E000, E00, E02.
hair was coloured with E31, E35, E50. The background shading / shadows and tinge of shading on her face was achieved with polychrome pencils.

This picture just shows the stitching on the background layer. It all adds to the embellishment of the card. I only have a vintage sewing machine you know the type you crank the handle round. It was only cheap think it was £25 at a junk shop, But its been worth its money I've used it and better used it, for cards and cushions and the odd horse rug repairs.
On this card i used Kaiser craft  peachy keen papers. The blues and browns and pattern on the papers, when so well with the colours I had used with the stamped image. So how do you start your cards? Do you choose the papers ? and then colour your image to compliment the papers? Or do you colour image first then hunt through your papers to see what works?
I do both, sometimes I have a paper I just have to use because I love it and, I have an idea of what I want to do with it. Other times its the stamped image that comes first with the colouring and how I want it to look. Then have to work round it with papers and embellishments to compliment and match. To embellish this card added seam binding, lots of pearls, pearl sprays, lace, 
also used the Tim holtz alterations scroll work die, and the Mather Stewart branch punch.
The scroll work die looked like waves from the sea and the branch added a look of coral or seaweed. to carry on the nautical theme to the card.
So that's it your finished card.
I hope I have inspired you to create your own cards and projects.
The paperlane craft shop has many of the items used for this card in store. Some of what I have used is my own stash like the lace.

Thank you visiting this blog. Please feel free to leave comment or ask questions about the cards I make. All comments are truly appreciated.
please feel free to visit my blog to see more of the cards and other stuff I have made
Elegantly crafted
bYe ByE
for now
Klare
:O)
x


Wednesday, 20 April 2011

8th May - Paperbag Book Workshop

Hello All! Hope you are well - the sun is shining in North Yorkshire - so life is good!

On the 8th of May, Kerry (that's me! Lol!) will be running a workshop here at the Paperlane on making these cute paperbag books. They are bit more work than a standard 6x6 card, but are such a lovely keepsake - and they are really quite addictive to make too! All materials, tea and coffees will be supplied - just bring your craft kit, and a packed lunch!

Here is the sample of what we will be having a go at - all the lovely materials used to make this are stocked at The Paperlane. Please drop us an email for details booking a place - you will find the address in the 'About Us' Section.

All of the papers used on the paperbag book were Basic Grey - Kioshi Collection. The cardstock used is Bazzill Basics.
The front cover - with ties to close the book. The main image here is from the new Butterfly Dreams Collection by Magnolia Stamps. The detail die cut is a Tim Holtz 'Elegant Flourishes', decorated with Hydrangea flower blossoms, punched with a Martha Stewart punch.

The main image again is from the Butterfly Dreams Collection. The sentiments are all Hero Arts, with a Magnolia Doo Hickey tag.

Again, the image is from the Butterfly Dreams Collection. The sentiments are all Hero Arts. The detail punching has been done with a Cherry Blossom Martha Stewart 'Punch Around The Corner' set.

The back cover - decorated to show who sent it! Lots of glitter and Viva Decor Pearl Pens just add a few finishing touches.

Looking forward to seeing you! All the details for our regular classes can be found here!

Enjoy the sunshine! Kx